
Mmmmm, sweet corn–this crop nearly causes a riotous mood at the Farmer’s Market and there are so many experts on the subject (lol). Everyone has their opinion and their favorite variety or color AND they all know the perfect time it should be picked. When I was growing up there was Silver King, Golden Queen, and Peaches and Cream. That’s it. 3 varieties to choose from.
Nowadays there are hundreds of varieties to choose from and “they” have been messing with corn seed, so the first question out of a customer’s mouth is “Is it GMO”? Rather than what kind is it. Hmmmm, that’s pitiful!
Okay, I was almost ready to climb on my soapbox but GMO’s aren’t the subject of this post, the subject at hand is how to preserve that wonderful taste for winter consumption!
Using as-fresh-as-you-can-get sweet corn, shuck it and remove as many silks as you can or as many as you want to, without washing the corn. I have found that a dry veggie brush works well, along with picking out with your fingers. The corn has been protected in layers of husks so it’s cleaner than it would be after you washed it with tap water–that’s another soapbox episode…..
After the ears are clean, take a knife and cut the kernels off the cob. I cut close to the cob to get the whole kernel and I don’t fool with scraping out the “milk” because I usually get all the kernel and the milk in one cutting. This is done in a very large bowl with a small bowl turned upside down in the center of the big bowl to prop the ear on while cutting. This keeps you from having to reach down inside the bowl to cut the kernels off.
No seasonings are put in the bags so I can use the corn either as creamed corn by adding milk and butter to it when cooking, or to salsas and salads, just like it comes out of the bag–naked.
Once I have about 2 cups of kernels cut off I put them in a Pyrex measuring cup and cook them in the microwave for about 3 minutes or until the corn is really hot, then I spread them out in a sheet cake pan that’s sitting on ice cubes in a large jelly roll pan with sides on it. This cools the corn really quickly and stops the cooking process.
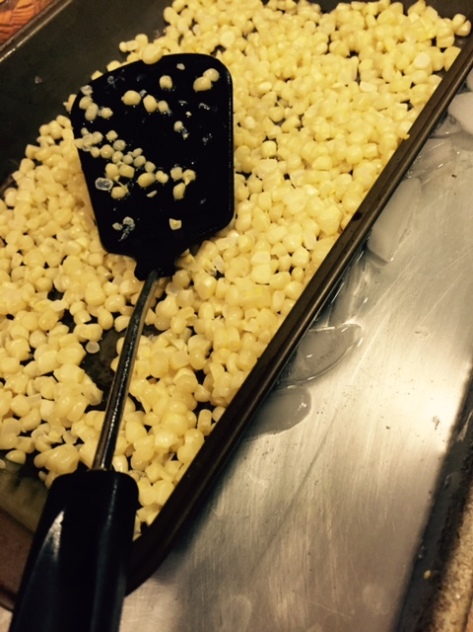
Once you’ve spread out a batch of 2 cups onto the baking pan, cut off another 2 cups and start them in the microwave. Bag up the corn that has cooled, flatten out the bags so they will freeze flat, label, and place in the freezer. This starts an assembly line of sorts and the process seems to go quickly–well, unless you’ve got 15 dozen to do, then it’s not too quick.
When making up small bags, like for one person, I like to use sandwich bags and then place the sandwich bags inside a gallon freezer bag. This saves money because sandwich bags are much less expensive than freezer bags.
This is a great method for me since I don’t use air conditioning in the house and it doesn’t heat up the kitchen like traditional “heat it in a pot” techniques.
Hope this helps with some of your late summer preserving chores!
