Category Archives: recipes

Speedy Miso Spinach Mushroom Ramen

So, anybody else get in eating ruts?  I’m sure you do, and every couple of months I get bored with the meals I’m preparing, especially in the winter when there’s not much fresh coming in and I just sort of panic every time I go to the grocery store because I don’t know where the food came from, how it was handled and treated, yadda, yadda, yadda.

I subscribe to a blog called “Vanilla and Bean” and she has some interesting recipes on there occasionally.  Recently there was a post for this noodle dish that looked interesting for a bowl full of comfort food during this last leg of winter.  The high tunnel is about finished but there is a little spinach hanging on and I was able to glean a bag of that, and a couple of days ago a walk through the mushroom corner yielded about 8 nike shiitake mushrooms, so that’s why the recipe caught my eye.

Ever buy stuff at the store thinking “hmmm that looks interesting”, get it home and can’t figure out what to do with it?  Well, miso was hanging out in my fridge just screaming “use me, use me” every time I opened the door.

This was it…..I used it!!

And it was good.

Here’s the recipe…… from Vanilla and Bean

Speedy Miso Spinach Mushroom Ramen

A fast and hearty weeknight dinner. Speedy Miso Spinach Mushroom Ramen is packed with ginger, garlic, shiitake mushrooms and oodles of soba noodles! Vegan + Optionally GF

 Total Time 30 minutes
 Servings 6 Servings
 Author Traci York | Vanilla And Bean

Ingredients

  • 2 Tbs Coconut Oil unrefined, virgin, cold pressed
  • 12 oz (340g) Shiitake Mushrooms stems removed, sliced thin
  • 1 Tbs Grated Ginger I use a microplane
  • 1 Tbs Grated Garlic I use a microplane
  • 4 Green Onions sliced thin, whites and green seperated
  • 4 C (940g) Vegetable Broth
  • 3 C (675g) Water
  • 2 Tbs White Miso
  • 2 Bundles (152g) Soba Noodles
  • 5 C (95g) Baby Spinach
  • Tamari, to taste

Serve With:

  • Sesame seeds, Sriracha, fresh herbs such as basil or cilantro, tamari and more green onion tops

Instructions

  1. In a Dutch oven (non stick is very helpful here), heat oil until shimmering. Turn the heat down to medium low to low and add the mushrooms, ginger, garlic, and white parts of the onions. While the pot will be crowded, allow the bottom layer of mushrooms to cook for a few minutes before stirring. This will help the mushrooms sear a bit. Stir occassionally for about 6 minutes. You’ll notice the garlic and ginger stick to the bottom of the pot (but watch the heat because you don’t want the garlic and ginger to burn). Just scrape the garlic and ginger when you stir the mushrooms. When the bimg_2793roth is added, the pan will deglaze and those bits will add delicious flavor! Add the broth, water and miso and bring to a boil, mashing the miso to break it up. Once boiling add the noodles, turn down to medium and simmer for five minutes or until the noodles are tender. Taste for seasoning adjustment and add Tamari if a more salty taste is desired.

  2. Ladle into soup bowls, top with a handful of spinach and sprinkle with sesame seeds. Serve immediately with extra spinach, sesame seeds, sriracha, herbs, tamari and onion greens.

  3. Store leftovers in a lidded container, in the refrigerator, for up to three days.

    Of course I never have all the ingredients, so instead of green onions I used regular onions and I buy organic ginger when I’m at Earth Fare in Knoxville and freeze it in 1″ sections.  That way I can take it out of the freezer and use it in recipes as needed.  I also used chicken stock because I have homemade chicken stock in the freezer.  I put a generous handful of spinach leaves in the bowl and poured the noodle mixture over it.

    img_2794I’m glad there’s leftovers…….

Sugar free, all natural “ice cream” (no churn, either!)

IMG_1589.JPG

I can’t believe that this awesome way of making ice cream is just now making it my way.   Once I tried it and was totally blown away, the two friends that I shared it with had already done it!!!  What?  How?

Last summer I procured an ice cream maker from a friend–well actually, we were in a thrift store and I bought a paper cutter for $1 and she bought an ice cream maker for $2 and we traded!  I was looking up recipes online for sugar free ice cream and wasn’t having much success, until I ran across the old frozen banana ice cream trick!  Have no idea which site it was on, but I definitely don’t take credit for the idea.

All you do is get a ripe banana or three, peel and slice into 1″ slices.  Freeze them for at least 2 hours.  Put them in a food processor; I’ve got one of those small one cup processors and it wouldn’t handle the job, so I had to empty the banana chunks into my regular size food processor.

Pulse the chunks until they are a little smaller, stop the machine and scrape the sides.  Pulse again until they are even smaller, stop and scrape, and do this several times and keep on processing until all of a sudden the consistency becomes like, well, just like ice cream!  The flavor is not surprisingly not intensely banana and could be flavored chocolate really easily, and as a matter of fact, there is a bunch of ripe bananas on the counter right now that will become chocolate ice cream tomorrow….yum!

By the way, it doesn’t quite taste the same if you freeze it after making it, although I’d say letting it sit out for a few minutes would make it creamier.  This is so welcome to my diet, as I have pretty much eliminated sugar but still crave ice cream once in a while!!

I still haven’t used the ice cream maker either……

Here, chickie, chickie, there piggy, piggy, gone turkey, turkey,

Okay, so the title doesn’t make much sense…..yet.  Keep on reading….

It’s been a while since I last posted any updates here and it’s the same old excuse–I’m BUSY!!!!  This is a one-woman operation , you know, and the secretary has been busy cutting and splitting firewood, which leads me to explain “here, chickie, chickie”.

If you’ve been following this blog, you’ll know that I’m in the process of “harvesting” the three-year-old hens.  I lack about 8 being finished.  Well, one of the Amerecaunas has started cozying up to me, like following me all around the yard every where I go!  She doesn’t know that all the green eggers have free passes because I have no idea how old each of them are AND I don’t have but about 4 of them because if a hawk gets a chicken, it’s usually an amerecauna, for some odd reason.  Maybe they’re easier to pick up or something.

I was splitting firewood on Tuesday (with my secretary…lol) before Thanksgiving  and this chicken kept getting right under my feet.  Thank goodness she didn’t follow me to the other side of the farm where I was using the chainsaw.

“There, piggy, piggy”–wild hogs have invaded the farm.  A couple of weeks ago I had sent out an e-mail to the organical veggie list for a veggie drop on Wednesday.  I had gone to the large high tunnel Wednesday morning to harvest greens and whoa, nellie!  There were humps of soil 2 feet tall in the high tunnel and all around the outside of it.  The hogs were after all the goodies under the years of rotting leaves.  I put an electric fence up around the elderberry patch and the high tunnel, so then they proceeded to the herb and flower gardens.  The plants are still there, just a vast majority of them are buried.  I’ll uncover them as I can throughout the winter.  I haven’t seen any signs of them in the last few days, so maybe, just maybe, they made it into someone’s freezer.

Gone, turkey, turkey should be pretty self explanatory, EXCEPT I made the best dressing.  ever.  I thought so, anyway.  I melted a 2″ chunk of butter, sauteed a chopped onion, chopped celery, about 9 cloves of garlic, a handful of jerusalem artichokes, a couple of chopped carrots, a Wild Things Farm homegrown shiitake mushroom that had been chopped, and a handful of walnuts.

I made a pan of cornbread after I put the fire out in my oven–yes there were actually flames from some milk that I scalded all over the stovetop (that’s the first step in making homemade yogurt, you know, to scald the milk and see just how much of a mess a quart of milk will make when it creeps out of the pot) and into the pan under the eyes and obviously into the oven as well.    I thought the smoke detector was going off because of the hot oil I was preparing to put the cornbread batter in, but actually it detected the fire in the bottom of the oven.

After cleaning the oven and airing both it and the house out for half an hour or so, I baked the cornbread and crumbled it, along with a few slices of whole wheat bread, and moistened it with broth, then added the other ingredients.  It was then placed in a baking pan and baked for about 30 minutes.  Mmmmmm…….. good!

So, along with all the other veggies and goodies we had at the Thanksgiving table, turkey be gone, gone, gone!

Okay, that’s enough external stimulation from this hoer today.  Till next time…….please eat your greens!


Preserving sweet corn

Mmmmm, sweet corn–this crop nearly causes a riotous mood at the Farmer’s Market and there are so many experts on the subject (lol).  Everyone has their opinion and their favorite variety or color AND they all know the perfect time it should be picked.  When I was growing up there was Silver King, Golden Queen, and Peaches and Cream.  That’s it.  3 varieties to choose from.

Nowadays there are hundreds of varieties to choose from and “they” have been messing with corn seed, so the first question out of a customer’s mouth is “Is it GMO”?  Rather than what kind is it.  Hmmmm, that’s pitiful!

Okay, I was almost ready to climb on my soapbox but GMO’s aren’t the subject of this post, the subject at hand is how to preserve that wonderful taste for winter consumption!

Using as-fresh-as-you-can-get sweet corn, shuck it and remove as many silks as you can or as many as you want to, without washing the corn.  I have found that a dry veggie brush works well, along with picking out with your fingers.  The corn has been protected in layers of husks so it’s cleaner than it would be after you washed it with tap water–that’s another soapbox episode…..

After the ears are clean, take a knife and cut the kernels off the cob.  I cut close to the cob to get the whole kernel and I don’t fool with scraping out the “milk” because I usually get all the kernel and the milk in one cutting.  This is done in a very large bowl with a small bowl turned upside down in the center of the big bowl to prop the ear on while cutting.  This keeps you from having to reach down inside the bowl to cut the kernels off.

No seasonings are put in the bags so I can use the corn either as creamed corn by adding milk and butter to it when cooking, or to salsas and salads, just like it comes out of the bag–naked.

Once I have about 2 cups of kernels cut off I put them in a Pyrex measuring cup and cook them in the microwave for about 3 minutes or until the corn is really hot, then I spread them out in a sheet cake pan that’s sitting on ice cubes in a large jelly roll pan with sides on it.  This cools the corn really quickly and stops the cooking process.

FullSizeRender


Once you’ve spread out a batch of 2 cups onto the baking pan, cut off another 2 cups and start them in the microwave.  Bag up the corn that has cooled, flatten out the bags so they will freeze flat, label, and place in the freezer.   This starts an assembly line of sorts and the process seems to go quickly–well, unless you’ve got 15 dozen to do, then it’s not too quick.

When making up small bags, like for one person, I like to use sandwich bags and then place the sandwich bags inside a gallon freezer bag.  This saves money because sandwich bags are much less expensive than freezer bags.


This is a great method for me since I don’t use air conditioning in the house and it doesn’t heat up the kitchen like traditional “heat it in a pot” techniques.

Hope this helps with some of your late summer preserving chores!

Yummy Pasta with Keilbasa and Swiss Chard recipe

It’s that time of year–the CSA season has started and the weekly shares contain greens.  What to do with all those greens?  One of the long-time CSA members shared a recipe the other day that I just had to try.

It was about 8:15 by the time I made it to the kitchen yesterday evening, and I almost wimped out of cooking to eat something quick and easy, but I forced myself to make this recipe.  It can be found at epicurious.com.

INGREDIENTS

  • 3/4 pound Swiss chard (preferably red; from 1 bunch)
  • 1/2 pound kielbasa, quartered lengthwise, then cut crosswise into 1/2-inch-thick pieces
  • 2 tablespoons olive oil
  • 1/2 teaspoon salt
  • 2 garlic cloves, finely chopped
  • 1/2 cup water
  • 1/4 teaspoon dried hot red-pepper flakes
  • 3/4 pound penne
  • 1 pound finely grated Parmigiano-Reggiano (1/2 cup) plus additional for serving

PREPARATION

Cut out center ribs and stems from chard, then thoroughly wash, along with leaves, in several changes of cold water. Cut ribs and stems crosswise into 1/4-inch-thick pieces and coarsely chop leaves.

Cook kielbasa in oil in a 5-quart heavy pot over moderately high heat, stirring occasionally, until golden, 2 to 3 minutes. Transfer with a slotted spoon to a bowl. Cook chard ribs and stems with salt in fat remaining in pot over moderate heat, stirring occasionally, 3 minutes. Add garlic and cook, stirring, 1 minute. Add chard leaves, water, and red-pepper flakes and simmer, partially covered, until chard stems are tender, about 5 minutes. Remove lid and stir in kielbasa.

Cook pasta in a large pot of boiling salted water until al dente, then reserve 1/2 cup pasta-cooking water and drain pasta in a colander. Add pasta to chard mixture with cheese and salt to taste and toss until combined well. Thin with some of reserved pasta water if necessary.

Of course I didn’t have all the exact ingredients.  I have a hard time with sausage–mainly not knowing what’s in it.  Nitrates and nitrites–I try to avoid.  While perusing the aisles at the local grocery store I found this….

IMG_0515
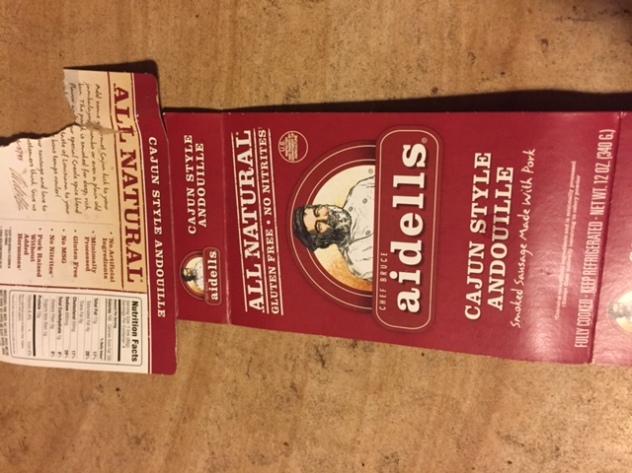
It’s not kielbasa, but it has no nitrates!  Also, I didn’t have penne pasta, so I used elbow macaroni (wheat).

I followed the recipe pretty closely, although I didn’t remove the sausage from the pan after sauteeing it–I just added the chopped stems, then garlic, then leaves, then pepper flakes.

At 8:40 I dished up the chard and sausage with pasta.

Oh my gosh!!!!  I couldn’t stop eating, and the best part is, there’s enough for another meal!

IMG_0514

Turnip Apple Slaw

Wow, since it’s cold outside and the gardens are through, it’s finally time to actually play around with veggies-n-recipes!  Looking through the fridge this afternoon, I found a few turnips and apples so I’m trying one of the many, many, I mean MANY recipes I’ve cut out of magazines, newspapers, copied from cookbooks, the Interweb, as well as few handwritten ones–hoping to eventually share them with customers and blog lookers.

The collection started out somewhat organized in a binder, but then it’s ended up stuffed and running over……

Back to the regularly scheduled program,

Turnip Apple Slaw

2 tbsp plain yogurt
2 tbsp soy or regular mayo
1/4 tsp freshly grated black pepper
1 tsp honey
1 apple, quartered, cored and thinly sliced (use your grater’s flat blade)
2 turnips (3″ diameter), peeled and coarsely grated
1 scallion, finely chopped

Combine the yogurt, mayo, pepper and honey in a large bowl.  Mix in everything else and toss.  Chill before serving as a side dish or use on burgers or sandwiches.  Serves 4.

I cut this recipe out of the Mother Earth News, Oct/Nov 2007 issue

Dee-lish!

My new favorite snack

snacksinpan
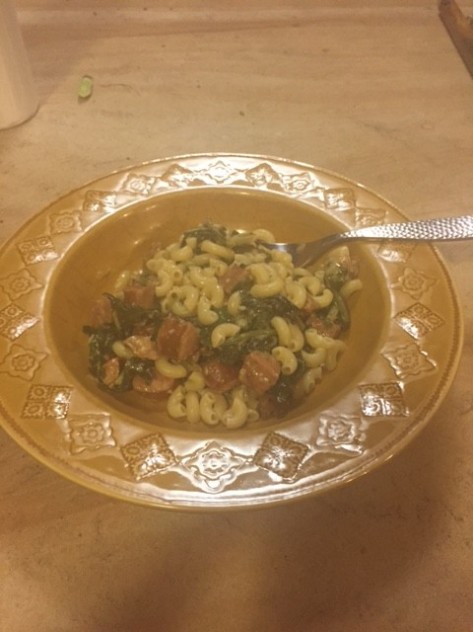
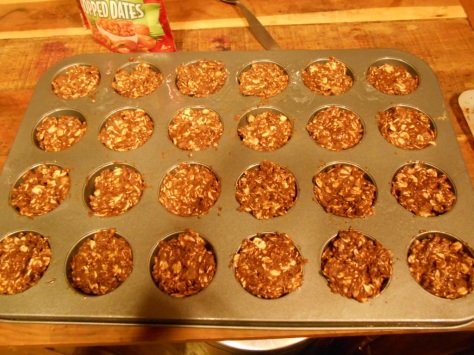
Who doesn’t need a snack during the day to tide the stomach over until time for the next meal.  I’m not talking unhealthy snacks like potato chips, cookies, or such–this snack is simply AWESOME and healthy, too!   Oh, did I mention addictive as well?

As a self-proclaimed chocoholic (thanks, Dad) for years it was all about milk chocolate and the occasional white chocolate.  Since weaning myself from white sugar I discovered that milk chocolate has a LOT of sugar in it and there’s no such thing as white chocolate–it’s really just a yummy mix of sugar and fats that’s white so it’s called white chocolate instead of sugar and fat…….

The recipe I’m gonna share with you is called:

Mini Peanut Butter Chocolate Oatmeal Cups (makes 24)

Hang on to your spoon, here goes!

chocpeanbuttsnacks
2 cups old fashioned rolled oats
3 oz dark chocolate
1 cup peanut butter
1/4 cup honey
1/2 cup chopped dates, raisins, or dried cranberries
1 Tablespoon chia seeds

Melt the chocolate–add the peanut butter and honey and mix well.  Stir in the oats, dried fruit of choice and chia seeds.  Mix well and press into a small muffin tin that has been sprayed with veg oil.  Put them in the fridge for about 30 minutes until they are set.  You can take the tip of a sharp knife and work them out of the cups and they pop right out.  The original recipe calls for paper liners but they are really a hassle–in my opinion, anyway.


These need to be kept in a covered bowl or bag in the refrigerator.

During the day (or night) when I get a craving for something sweet, I just reach in the fridge and grab one.  I haven’t calculated the calories as of yet, but made with dates they have 7g of sugar each, and NO processed sugar.

Update:  I’ve been making them with raisins and they are less sweet.  Also started making my own peanut butter so even less sugar doing that!!

Sweet Potato and Kale Fritters—YUM! (photos added back 7/2/17)

gratedswtater
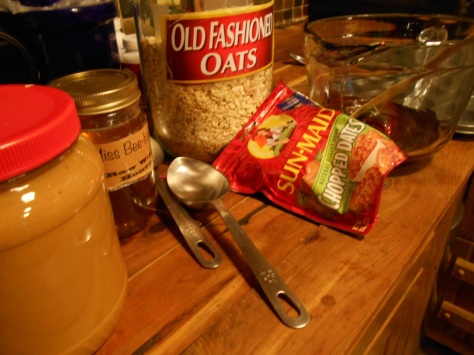
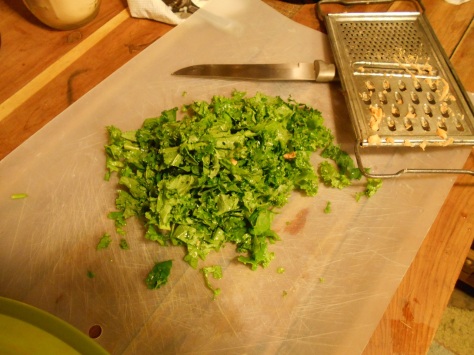
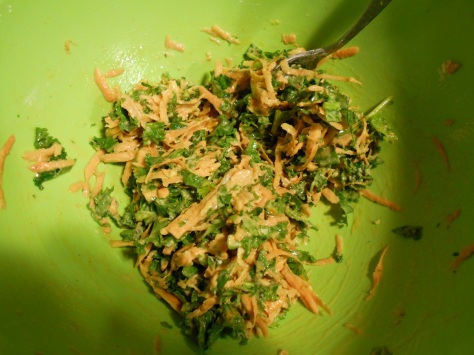
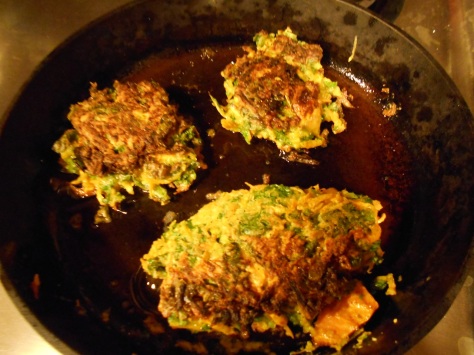
Okay, I’m getting a little creative in my attempts to consume green leafies every day.  Most days I resort to munching on kale while I’m harvesting it–which is probably my favorite way to eat it.  The CSA season is winding down, and  the regular season ended last week, but I’m filling a few vacation makeup boxes this week and next, BUT I can actually relax a little.  Well, almost.

The large high tunnel has been stripped of its summer cover crops of beans and lettuce, kale, chard, arugula and braising mix have been planted and are being coddled along with sprinklers every day.  The small high tunnel is in the midst of seasonal turmoil with a perfectly healthy tomato crop being removed–it’s so hard to do that–lots of composted leaves and chicken manure thrown down, and spinach being planted in for the upcoming winter crop.  I’m going to try a little cress this year as well–haven’t grown that before.

Back to the regularly scheduled program—Sweet Potato and Kale Fritters.  Feeling a lot hungry and a little creative, I grabbed a half dozen of the skinny, not-saleable sweet potatoes and grated them on the grater

I probably ended up with 1/2 to 3/4 cup of potatoes grated.

Then I took a large handful of washed kale and chopped it sort of finely

choppedkaleweb

I’d say there was about a cup of chopped kale.

Of course anything like this needs onion and garlic and since it was after 8:00 pm, I used minced dried onion and garlic powder.  To stick it all together I grabbed a fresh egg from the happy hens and a heaping spoonful of flour.  Quick mix with a spoon, and

kalenswtatermixtureweb

a nice sticky mixture to make fritters with.  I put a glog of olive oil in one of my trusty cast iron pans, heated it for a few minutes, then put in a small handful of mixture.  Let it brown on one side and give them a flip.  I did turn the heat down just a little so they would cook through before browning too much……

kalenswtaterfrittersweb

All I can say is YUM!  I ate the two smaller ones along with fresh sweet corn, sauteed summer squash and a big yellow Mr. Stripey tomato.  It doesn’t get much better than that 🙂

My new favorite drink

I’ve had a love/hate relationship with ginger my whole life.  Having never tasted “real” ginger until a year or so ago, I always thought ginger lived in the nasty little gingerbread men at Christmas and the yukky gingersnap cookies that are smashed and hidden in desserts.

One day while in the produce section I snagged one of the gnarly roots for myself.  The first thing made with ginger was simple ginger tea.  It was okay, and I made a couple of cups then the root molded and had to be composted.

This went on for several months and I read a recipe that called for ginger, lemon, and honey.  Hmmmmm……that sounds healthy and good.

So, back to the hidden corner of the produce section for more ginger–only by this time I had read that we do not want to consume ginger from China–it is very likely contaminated with heavy metals.  The ginger I spy in the supermarket sure enough, is from China.  On the next trip to Knoxville I go to Earth Fare and grab a root and a few organic lemons.  I had also read that ginger and lemon both freeze well–great!

To make one cup of this yummy beverage, use a 1 inch piece of peeled ginger and 2-3 slices of lemon

gingerandlemoncutup1

Just chop the ginger into approximately 1 inch chunks, and peel it and slice it into really thin slices before you drop it in a small saucepan.  The thin slices allow for more surface area to infuse into the water.

Thin slices here……

lemoncutupNow add the lemons to the pan.  Note:  I’m making a pitcher of tea here so the recipe has been multiplied by 8.  For each cup of tea I use about 1-1/4 cups of water to allow for evaporation.

Pour the water in over top of lemon and ginger, bring to almost a boil then turn down to simmer for 10 minutes.  If you’re going to drink it hot, pour yourself a cup, sweeten to taste with honey, and enjoy immediately.  If you’re making a pitcher for iced tea–which by the way is VERY refreshing and delicious–sweeten while the tea is still warm, let it cool, pour into a pitcher and place in the fridge.

One of the best things about this is that both lemon slices and ginger can be frozen with no ill effects…..yay!  So, the extra lemon slices and ginger chunks (unpeeled) are placed in ziplock bags and placed in the freezer for future use.  No more molded ginger root.

When I’m ready to make a cup or pitcher of tea I take out what I need, drop the ginger pieces whole in the hot water to thaw just a few minutes so it can be peeled, then proceed with recipe as usual.

That’s a good thing when you live where the only ginger in town is from China and the lemons are coated with wax.

Oh, did I mention that the drink is super healthy too?

Update 9/8/14:  The ginger root pieces still have quite a bit of “ooomph” to them even after making this tea…..what to do with all that goodness?  I’ll have to figure it out!


Weaver Street: Roasted Sweet Potato Salad with Cranberry-Chipotle Dressing

At a friend’s house on New Year’s Day, I tasted a really, really good Sweet Potato Salad that her son-in-law had sent her the recipe.  I kind of overdid the chipotle peppers, but it was still very tasty:

Roasted Sweet Potato Salad with Cranberry – Chipotle Dressing

Ingredients:
2 ½ lbs. local sweet potatoes, cut into 1/2” cubes
¼ cup plus 1 tbsp. olive oil – divided
salt and pepper – to taste
3 chipotle chilies in adobo sauce – more for extra heat
5 tbsp. lime juice
4 tbsp. honey
4 tbsp. ketchup
2 cloves garlic, minced
½ c. cilantro
1 c. fresh cranberries
1 c. slivered toasted almonds
1 ½ c. chopped green onion, green and white parts
Preparation:
1) Preheat oven to 350 degrees F. Spread sweet potatoes on a baking sheet. Drizzle with 1 tablespoon olive oil, sprinkle with salt and pepper and roast for 25 minutes, stirring once, until tender but still firm.  Remove from oven and allow to cool.
2) In a blender or food processor combine, chipotle chilies, lime juice, honey, ketchup, garlic and cilantro.  Process until pureed.  Continue to process while adding remaining olive oil in a slow stream until mixture thickens.  Set aside.
3) In a medium pot, add cranberries, ½ cup of chipotle mixture and ½ cup of water.  Cook over medium heat until cranberries burst.  Use the back of your spoon to crush the cranberries, this will thicken the juices. Allow to cool.
4) In a large bowl combine roasted sweet potatoes, chipotle chili mixture, cranberry mixture, almonds and onions, season to taste with salt and pepper.

Of course I didn’t have ALL the ingredients–I had to substitute dried cranberries for the fresh, but instead of cooking them until they popped, I cooked them until they fluffed up–it was still great!

sweetpotatosalad3web