Tag Archives: bees

It’s all about the Queen (honey bee, that is)

This is the third year of my adventures in beekeeping on the farm.  It has been challenging, to say the least!   Last year my bee buddy told me we were going to raise queens this year.  I said “we?”  You gotta mouse in your pocket?  She laughed and told me one of her bee buddies had set her up with a frame, tool, and one of those magnifying visors and he wants her to start raising queens, so she sucked me into the adventure.  Anything to learn about bees, I’m game.

She did all the prep work as far as putting nurse bees into a nuc the day before (queenless) with the brand new queen cups so they would clean the cups and get them ready for the larva to be inserted.

Now this isn’t going to mean much to folks who don’t know much about bees, but imagine taking a dental tool and removing a worm (that’s about 1/8 long) from a honeycomb cell and transferring it to another cell, placing it exactly in the center of the bottom AND making sure that you don’t injure it AND it has to be right side up.  Bee eggs are laid in a little puddle of royal jelly so they breathe through the top part of their bodies so they have to be placed right side up and they aren’t marked!

Difficult, to say the least.  My bee buddy wanted me to be “the eyes” of the operation (haha–she who has reading glasses laying in a trail behind her all over the place)

Anywho, we spent two days grafting eggs……

queengrafting4 queengrafting3
queengrafting1

Not two full days, just larva-transferring operations on two different days.

I eat and write with my left hand but sew, use scissors, and everything else with my right hand.  When confronted with a new task it takes me a few minutes to decide which hand to use.  She also had about 4 different kinds of grafting tools to try out.  I decided that I don’t do this well with either hand!

From the first batch of 23 cups we got 10 that the bees actually started working on.  The second batch of 30 we only got about 6 that the bees accepted.  THEN the nights got cold and the bees decided to cluster to keep warm rather than work on the queen cups.    She texted me and said we might get 5 out of both frames.

Oh well, we got some practice and will try again when the nights are above 50.  It’s an adventure!

If you are a bee-type person and want to see the YouTube video that inspired this operation, here it is:

How to deal with a laying worker bee

Geez, I didn’t realize beekeeping was going to be so challenging!  Starting out with 3 hives, and then down to 1 during the first summer–it overwintered year before last just fine, so I made 2 splits last spring and was back up to 3 hives.  I lost one during late winter this year and last week I looked in the hives and found the remaining split had a laying worker bee.  Workers, if they ever lay eggs at all, can only lay drones so the “brood nest” was full of drone cells.  A laying worker usually means no queen.

Dang!  I called my mentor and she said the best way to deal with a laying worker is to take the hive several yards away, like maybe 100 yards, and dump the bees all out of the hive.  The workers will fly back to the hive and the laying worker and her attendants will stay there.

It’s been raining or threatening rain every day since I talked to her and I didn’t want to dump the bees out in the rain, so I researched on the Internet and discovered that a worker bees ovaries are stimulated by a lack of brood, which is caused by a lack of a queen.  One of the ways to deal with a laying worker is to stack that hive on top of a queenright hive with two screens between them.  That way, the queenless hive is getting pheremones from the queenright hive so the worker MAY stop laying.  My intention is to dump the hive in the grass a few days after they’ve gotten a good dose of pheremones from the existing queen.

Moving that hive was a fiasco, for sure.  You talk about pissed bees!  These bees are not happy at all.  I got stung on the leg through my jeans and somehow a bee got into my jacket and I could feel it crawling up my neck–trying not to panic I started walk/running away from the hive, but there were lots of bees escorting me from the apiary.  Once I felt like the coast (outside my jacket) was clear, I stripped off the jacket and discovered the bee had gotten tangled up in my hair–next to my head!

Still trying not to panic, I removed the elastic braid from my hair and starting finger combing.  After about 3 minutes of shaking and flinging and hearing the bee buzz scarily close to my head,  (btw I have enough hair for 3 people) she was free, and so was I!

Here’s a picture of the hive after being stacked up skyscraper style:

stackedhives4-8-15

You can see the screened bottom board of the queenless hive in the middle of the stack with a screened spacer right under it.  I turned the entrance to the opposite side of the bottom hive.  Hope it works…… I’ll get some pics of the drone comb mess when I dump the girls out in the yard in a day or two.

What’s the buzz?

beesonplate

These past few weeks have been simply awesome fall weather……bright sunny days and not-too-cold nights.  It’s been dry, dry, dry, though and couple that with late October, and there’s nothing for the bees to do outside!  I see them everywhere looking for something to carry back to the hive.  I think that the girls appointed one bee to follow me around the other day and just buzz me.  It almost seemed like she was saying “I’M BORED”!  So, I started thinking like a bee…..they like sugar syrup….so voila!  I poured a little syrup on 4 plates and scattered them around the yard.


Happy bees!

There’s a cold front moving into the area soon so I dragged out the frost blankets for the late season greens that are outside in the garden…..

rowcovers1014

Although the high tunnels have the same crops; lettuce, spinach, chard, kale, mixed greens–they have a ways to go until ready for harvest, so maybe I can stretch the outside season just a little.  I always have problems keeping the covers on the hoops when the wind blows, but maybe I can put enough rocks on the edges to hold them down for a few weeks.  When the weather gets really cold, the covers will be moved into the high tunnels for extra protection during freezing weather.

firepitalmost

One of the projects I’ve been picking away at during the summer is to build a fire pit in the front yard.  I detest grass and would rather watch paint dry as to mow, so I figured this would be a creative way to wipe out a good-sized area.  I’m waiting for a good deal on a load of attractive tan/brownish color gravel to  cover  the landscape fabric!

🙂

Preparing for Winter

The weather prognosticators are calling for really cold weather tomorrow night–first really “hard freeze” of the year, although my thermometer read 24 degrees last night.  So that means removing the irrigation pump from the pond and subsequently draining the lines that feed all the different garden areas and the drip irrigation spiderweb that is in place in the gardens.  Done!

Next is to install all the wire hoops over the beds in the high tunnels to protect the winter crops inside the high tunnels.   The second layer of protection inside the tunnels really makes a difference..

rowcoversinhightunnel11.13This is a shot inside the larger high tunnel which is 20×96.  This tunnel has lettuce, kale, braising mix, spinach, broccoli raab, endive, mustard, radiccio, and a few other greens. The newer tunnel is 12×80 and is protecting spinach, swiss chard, arugula and broccoli raab.  Oh, and both tunnels have a row of strawberries on each of the outer walls.  Strawberries outside in this area (on this farm, anyway) are “iffy” during late frosts and freezes in the spring so I’m trying them inside each tunnel.  So far I’ve been able to eat strawberries with my yogurt about 3 days a week.  We’ll see how they do on a production scale next spring.

On Saturday I opened the bee hive and on top of the frames of the top box I placed 2 layers of newspaper, cut a hole in the middle, then poured about 3-1/2 pounds of white sugar on the paper.  The sugar was then spritzed with water to “crust” over.  Several of my beekeeping buddies have said they are going to put a solid bottom board in over the winter because they are thinking that we will have a colder-than-normal winter–so, I decided to do the same.  I cut a piece of 1/4″ insulation and covered the bottom board just after I put the sugar on, then I went about my chores.

It was a beautiful Saturday, low 60’s and sunshine.  About 30 minutes after tending to the bees I noticed A LOT of bees around the entrance and a few of them on the front starting to “beard”–okay, maybe it was too warm to install the bottom board on Saturday.  I moved it back about halfway and a few minutes later all was back to normal.  It’s okay to deal with one or a few hives in this manner but you sure couldn’t do this with more than a few!  I’ve got a lot to learn about beekeeping 🙂

Wintertime around here also means doing indoor things and that includes soap making.  I LOVE patchouli scent and bought a couple of patchouli plants this past summer.  They are in pots in the house and doing well.  I’ve been collecting leaves from them to make an oil infusion and finally gathered enough to actually get it done.  I used sunflower oil as the base oil (it’s cheap and effective for this purpose).  I stuffed a pint jar full of dried patchouli leaves then filled it with sunflower oil.  Heat a pan of water to boiling, remove from the heat and set the jar of oil and leaves into the pot of water and let it cool.  Put a lid on the mixture and shake it up every time you walk by it for a few months.

patchoulioil


This is my first time doing this, so I’ll report back as the experiment progresses.

Lastly, the chimney for the woodstove is in progress–YAY!  Hopefully it will be ready to use by Christmas–I’m excited!

chimneyinprogressweb


I plan on stuccoing the block since it’s on the back of the house and not visible unless you walk all the way around to the back of the house.

Another winter project around here is winterizing the gardens.  The front bluff garden was in pretty good shape but there were 3 beds of overgrown lettuce, pepper plants, and a few ugly cabbages in addition to a few weeds.

I moved the electric poultry fence around this garden since it’s adjacent to the chicken pen anyway.  The girls went nuts!

chickenpeninfrontbluff


Now that they’ve gotten that garden cleared out they’ll be moved to the pond garden next–I appreciate all the help I can get 🙂


Liquid Gold

Last night I attended the Cumberland County Beekeepers meeting in Crossville.  This month’s agenda was to elect officers for the upcoming year, since we take a break from meetings in November and December while “the girls” huddle together for the winter.

After the nominations and elections were done we had a chat session, you know when people start chatting about bee things–I was chatting with the fellow next to me and this was his third year beekeeping and he had finally gotten a super of honey off one hive.  He told me that someone asked him how much he was going to charge for the honey and he told them “$400 a gallon”!

I think that’s too cheap–I still don’t have honey…..but my bee girls made enough (I hope) for themselves this winter and that makes me bee happy 🙂

First day in the Beeyard

As a newbee member of the Cumberland County Beekeepers Association, I’ve been assigned a mentor.  I’ve read about 3 books, countless older copies of The American Bee Journal and Bee Culture, looked through every beekeeping catalog made, been to a conference, built hives, got all the equipment needed, but today I got to actually go into beehives for real!  I was humming that song “I’m so excited, and I just can’t hide it, I know, I know….” anyway, the day was beautiful and warm for this time of year.  My mentor has hives off the mountain (the Cumberland Plateau) so she thought it would be warmer to work those hives today.

I gathered up all my brand new bee stuff, most of it still in the plastic packages, loaded them in my Subaru Veggie-soon-to-become a Veggie/Bee Wagon, and headed to her house.  She has a Subaru beewagon with a bee-trailer behind it and it was loaded with supers, frames, sugar syrup, bottom boards–more beekeeping equipment than I’d ever seen!  She made sure I had everything I needed and all I have is a jacket so she was going to loan me a pair of white pants to slip on over my jeans.  We went into the building where she keeps all her bee stuff and got distracted talking and left without getting the white pants—haha!

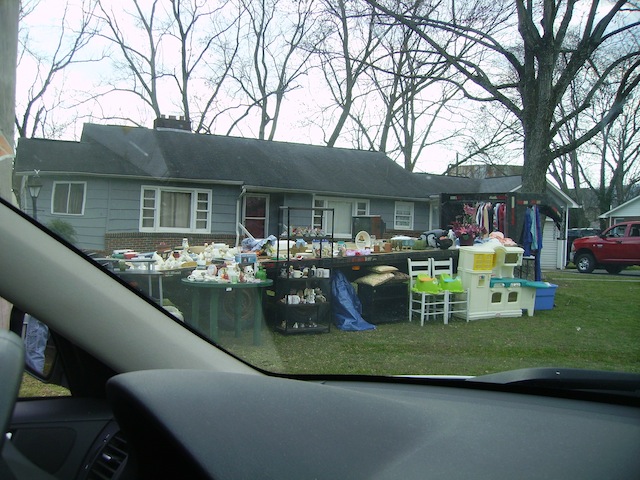
On the way to the bee yard we came upon a yard sale…….the bees can wait!

PENTAX ImageWe each got a few things and went on to the bee yard.

The first thing we did once we got there was to light our smokers.  I’ve never lit a smoker and I even commented to her that mine came with paper to light it the first time–it was the instructions on how to light it!  I stuffed paper egg carton in my shiny new smoker and lit it.  After stuffing a few pine needles and cones in it I had a pretty good fire going.  I’m used to building a fire in a wood stove, not a coffee can.  Although I got a fire going pretty quick and it was doing really well, in the end hers kept smoking the entire time, about 2 hours, and mine went out.  I need practice.

PENTAX Image

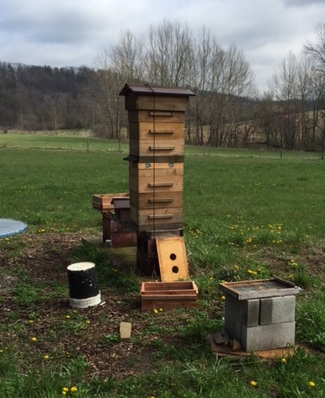
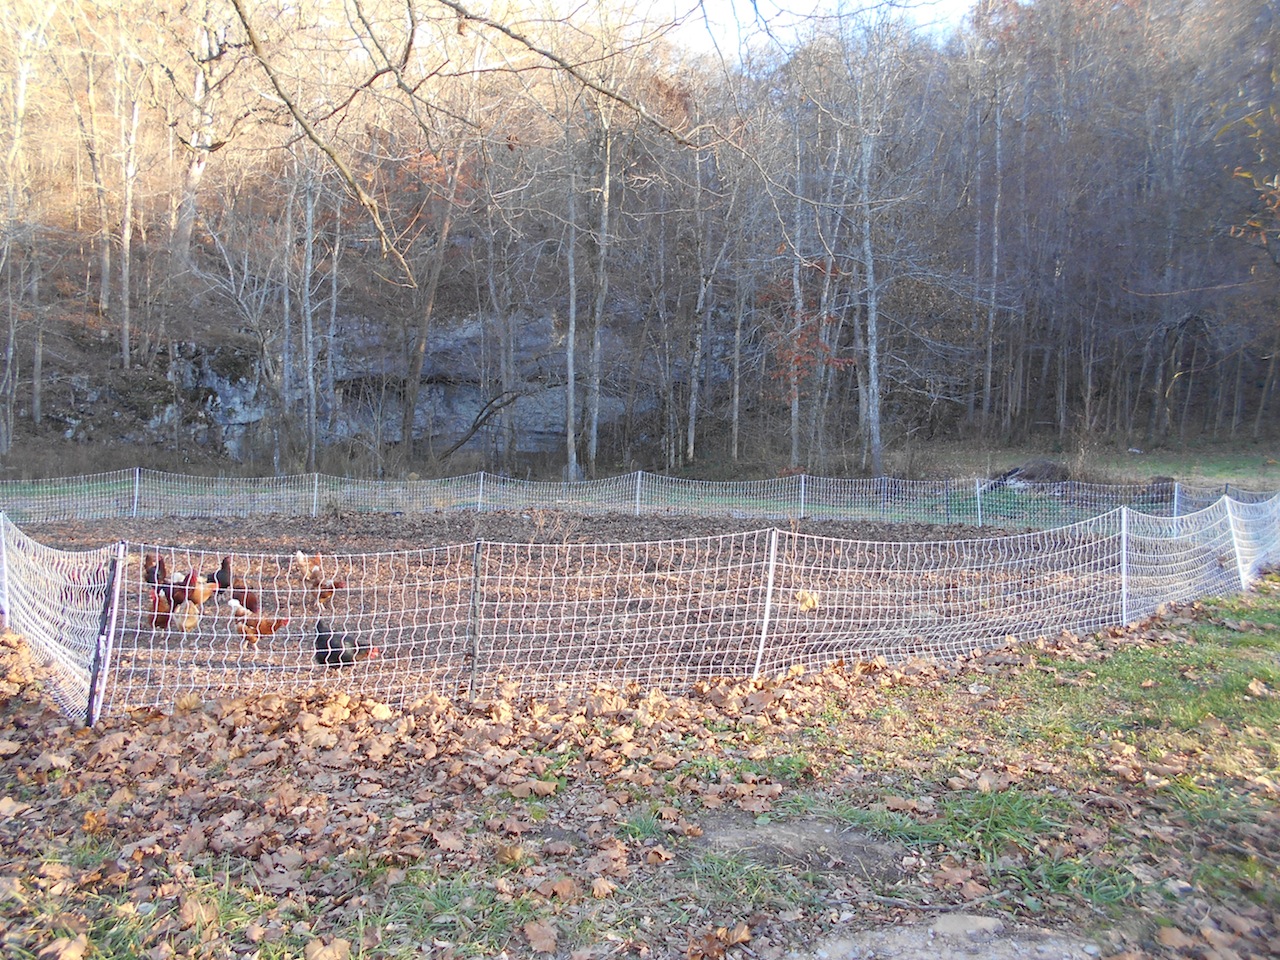
She has nine hives at this farm and was doing the first actual hands on visit for the season.   We could see from a distance that 2 of the hives weren’t as busy as the others and she said she knew that one of them hadn’t survived the winter.  We started opening hives, checking for brood, and changing out the bottom boards for ones that she had cleaned up and painted.  I got to see lots of things I’ve never seen before….

PENTAX Image
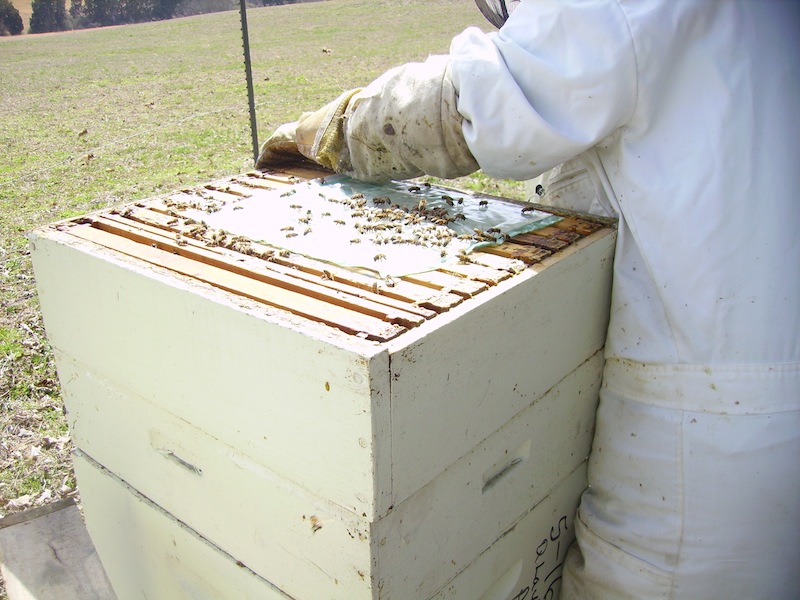
I’ve seen pictures of the “baggy” feeders, but have never seen them in person.  A great, inexpensive way to feed bees sugar syrup without drowning them.
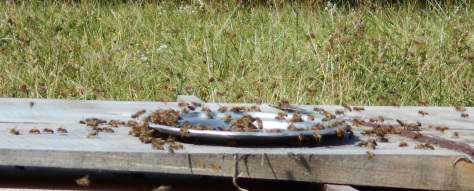
I believe this was one of the hives that had died, and there were just robber bees in there getting honey.

PENTAX Image
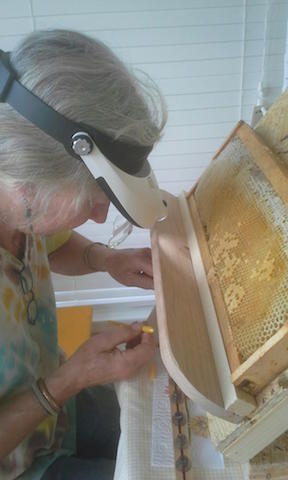
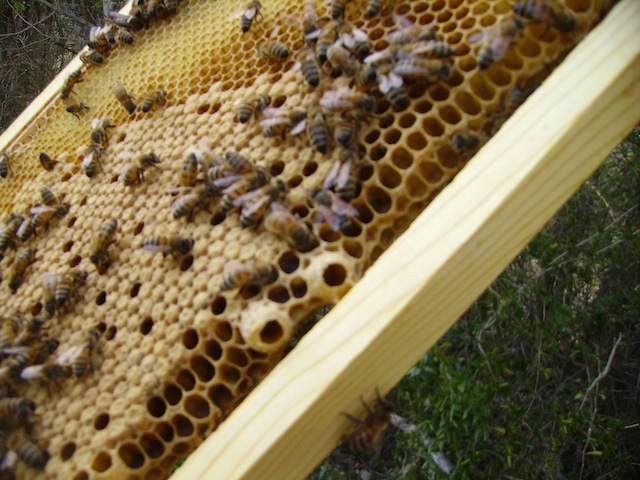
This was a frame that had honey on it.  When she pulled out a frame and asked me if I could see the eggs and larvae, I squinted and looked and tilted the frame every which way and couldn’t see anything.  Then I handed it back to her and said “I guess I need to go get my glasses”.  She cracked up.  After I got my glasses on I could see the larvae and the eggs.  It’s much easier to see them after you know what they look like–teeny tiny little itty bitty things…….

PENTAX ImageThis frame had queen cups on it.  When they are on the bottom of the frame like this I believe they are called swarm cells and that’s when the bees build queen cells, the queen lays eggs in there and then she takes half the bees in the hive with her and they leave…..something beekeepers try to avoid.

I saw a few hive beetles but those pictures were blurry–little small black round bugs that move around the hive–very destructive little bugs, I might add.  They can kill a hive if not kept in check, but I only saw 3 in all the hives today.  She also showed me some drones–they are bigger than the worker bees, and I saw two queens.  One of them had a big white mark on her head–she was easy to spot!  The other one took a little time and she kept going into hidey-holes so we couldn’t see her.  I did not get a picture of a mouse nest either.  It had actually built a nest in one of the frames and had eaten holes in several other frames, but we didn’t see the mouse.  The bees will repair the holes in the foundation so she just put them back into the hive.

Another very exciting thing I saw was a bee actually coming out of its cell–being born, if you will!  I was so excited.  That was way cool!  The bee crawled out of her cell then turned right around and cleaned it out–AWESOME!  Bees are so interesting!

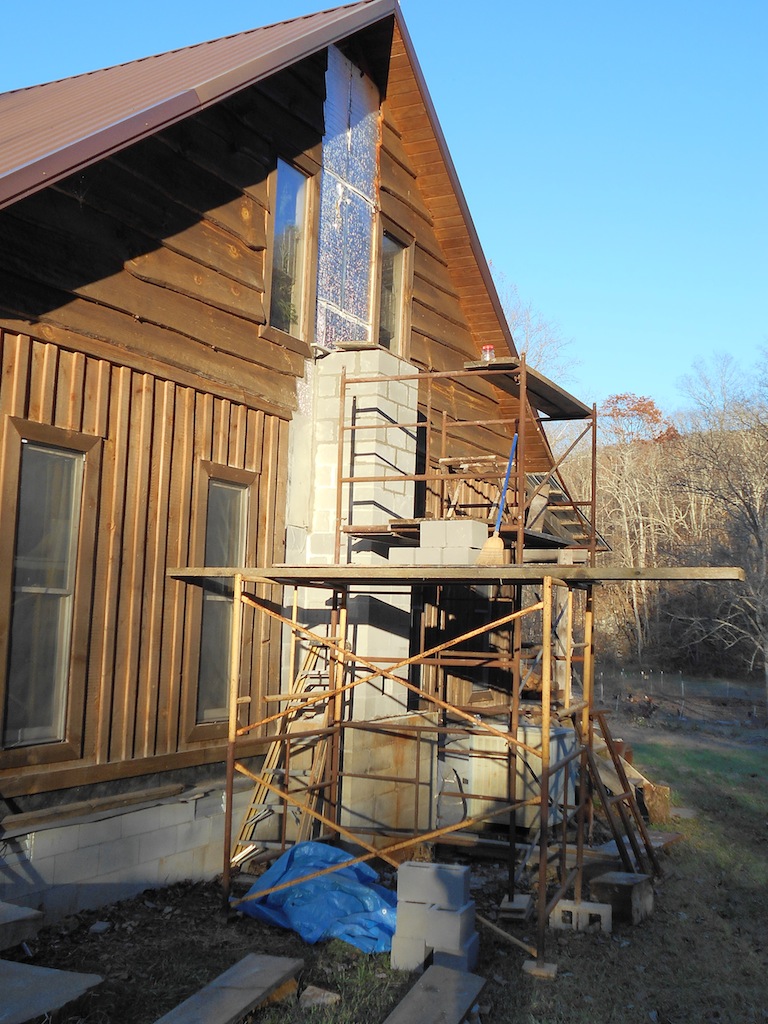
That’s about it for the first day of beekeeping–well, keeping someone else’s bees.  Mine are supposed to arrive in mid-late April and I can hardly wait.  The apiary is almost complete and ready for bees…….and no stings today!


Progress of beekeeping on the farm

As mentioned in an earlier post, back in the summer I got bitten by the “bee bug”.  After reading and reading and studying and attending meetings I’ve finally narrowed down the many choices for beekeeping styles to a Langstroth hive consisting of 8 frame medium supers.  They are lighter than the ten frame deeps that most beekeepers use, because they don’t hold as much honey and comb as the 10 frame deeps.  One thing I think I’m going to do is put Warre hive roofs and quilts on them to provide ventilation.  I didn’t know it but bees have a real problem with condensation inside their hives, especially in the winter.  The Warre hive quilt and roof provide “breathable” insulation and a vented roof and I’m going to put that on my hives instead of the normal flat roofs you see on beehives.

The area for the apiary on the farm that has been selected is nearby so I can watch the bees, it faces east, has a stream nearby, and is situated near a tree line to provide shelter from winter winds.  I’ve read that the ground needs to be clear of vegetation so if a bee falls on the ground while flying back to the hive that they can get back on their wings if not hampered by vegetation–so, I cleared the area from vegetation and now I’m spreading wood chips from the utility company all around to make a nice clear area for the hives.

During the state beekeeping conference I attended a workshop where our state hive inspector opened a hive and showed us all kinds of things inside the hive; I like to pick up little tidbits during workshops and one thing he did say that was quite interesting was that one of the beekeepers in the state uses a 1 inch layer of lime underneath his hives to combat the small hive beetle.  He spreads it to a 3 foot area around the hives and the inspector said he had never seen a beetle in one of those hives.  Well, I have a huge pallet of lime that a friend gave me to lime my gardens with when I moved here, but turns out that my soil has a pH of 6.8 so I didn’t need lime (very unusual in this part of the state).   That pallet of lime has just been waiting for my hives!  As soon as the wood chips are all in place and the hives go up, then I’ll place the lime in its new home.

Today I purchased the lumber for the hives and I bought enough frames to do one box–I’m so excited 🙂

More info as the bee project progresses!

It’s been a “beeesy” couple of days!

This summer I became interested in keeping bees on the farm, for a couple of reasons.  Number one is the increase in productivity of the crops grown on the farm, but also to maybe get a little honey off the hives to complement the mix of eggs, fruits, and veggies grown on the farm.

Earlier this year I met a lady selling honey at the farmers market.  Turns out that she and my oldest son worked together when he was in high school.  Well, she sort of “took me under her wing”, and invited me to the Cumberland County Beekeepers meeting.  I went to the meetings all summer, met some really nice people, and started learning about bees.  I didn’t realize that bees were so complicated!  And so well organized–and they don’t even have ears 🙂  It’s all done with pheramones.

I’ve purchased three books “Bees for Dummies”, Practical Beekeeping by Michael Bush, and The Backyard Beekeeper by Kim Flottum, who is editor of Bee Culture magazine.  My beekeeping friend loaned me about 60 or more Bee Culture and American Bee Journal magazines to read.  I’ve been reading, and reading, and Googling about bees and have just been really learning all I can about beekeeping and bees.

Well, beginner’s luck would have it that the Tennessee Beekeepers Association Fall Convention was held in nearby Cookeville on Friday and Saturday (28 & 29) this year and I was able to attend both days.  After learning about all the viruses, parasites, and hive bugs, the poor honeybees are struggling to stay alive.  Add to that something that I didn’t know and I bet a lot of you didn’t know:  In the spring there are about 1.6 million bee colonies that are moved to the almond plantations in California to pollinate the almond crop!  After the bees get through there they will be moved to other “pollination destinations” throughout the growing season.  These operations are also very stressful to the bees.

Another one of the classes at the conference was a hive inspection.  I didn’t know you were supposed to have a veil (I didn’t even own one).  A fellow Cumberland County beekeeper loaned me his hand-me-down bee suit:


That’s me!  We were all standing around our State Hive Inspector (he was teaching the class) and I could hardly get close enough to see in the hive so I stuck out my lower lip and mumbled “gee, I’ve never seen inside a hive”– well, the waters parted!  I got front row and a drone placed on my arm.  We saw lots of hive beetles, varroa on some larvae, and a bee with “deformed wing syndrome”.  All-in-all the hive was healthy though–the inspector said he could always find things in hives.

Another class I attended was nectar and pollen plants for bees–I was so happy when I left that class because the bee-girls are going to be thrilled at what grows around here!

Other classes on feeding bees, getting them through the winter and first year beekeeping just confirmed a lot of the information I had been studying.  I’m sure glad I did study before I went to the conference, because it would have gotten really confusing if I didn’t have that little knowledge beforehand.

They had door prizes and I won a year subscription to The American Bee Journal!  That was a nice prize.  Before I left the conference I bought a jacket and veil.  It makes the whole process feel more tangible–my first”bee thing” AND if someone does invite me to go with them to their hives, I’ll be better prepared.

One of the winter-time projects around the farm is to build bee-hives for the spring arrivals.  A couple of the presenters  said to get at least two and not more than 5 hives so they can be compared to each other.  I’ll post the progress of the beehive construction . . . a friend has promised to saw some poplar on his sawmill for this project, so for now I wait on lumber.