Tag Archives: timber frame diy

Preparing for Winter

The weather prognosticators are calling for really cold weather tomorrow night–first really “hard freeze” of the year, although my thermometer read 24 degrees last night.  So that means removing the irrigation pump from the pond and subsequently draining the lines that feed all the different garden areas and the drip irrigation spiderweb that is in place in the gardens.  Done!

Next is to install all the wire hoops over the beds in the high tunnels to protect the winter crops inside the high tunnels.   The second layer of protection inside the tunnels really makes a difference..

rowcoversinhightunnel11.13
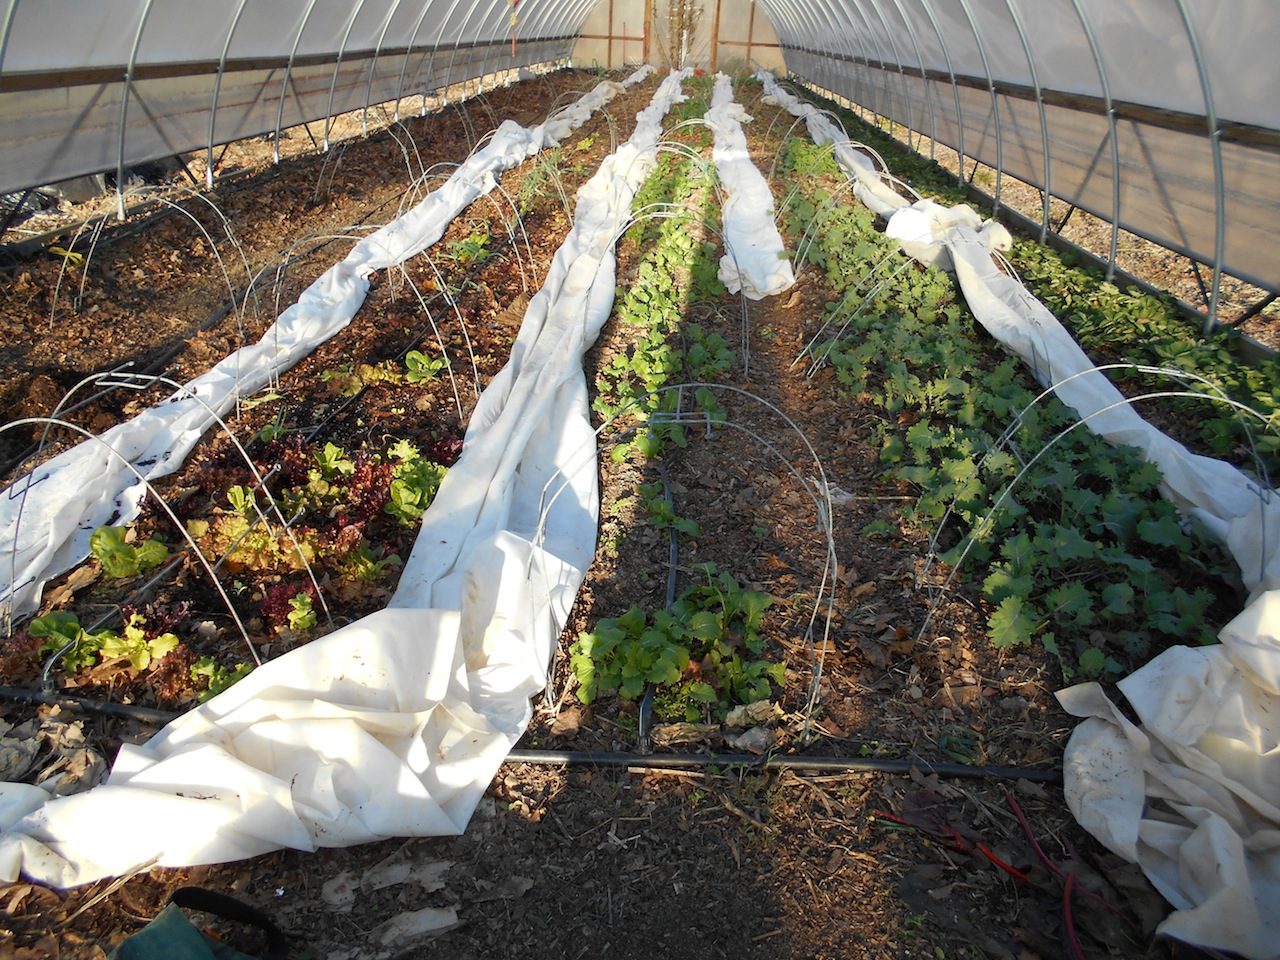
This is a shot inside the larger high tunnel which is 20×96.  This tunnel has lettuce, kale, braising mix, spinach, broccoli raab, endive, mustard, radiccio, and a few other greens. The newer tunnel is 12×80 and is protecting spinach, swiss chard, arugula and broccoli raab.  Oh, and both tunnels have a row of strawberries on each of the outer walls.  Strawberries outside in this area (on this farm, anyway) are “iffy” during late frosts and freezes in the spring so I’m trying them inside each tunnel.  So far I’ve been able to eat strawberries with my yogurt about 3 days a week.  We’ll see how they do on a production scale next spring.

On Saturday I opened the bee hive and on top of the frames of the top box I placed 2 layers of newspaper, cut a hole in the middle, then poured about 3-1/2 pounds of white sugar on the paper.  The sugar was then spritzed with water to “crust” over.  Several of my beekeeping buddies have said they are going to put a solid bottom board in over the winter because they are thinking that we will have a colder-than-normal winter–so, I decided to do the same.  I cut a piece of 1/4″ insulation and covered the bottom board just after I put the sugar on, then I went about my chores.

It was a beautiful Saturday, low 60’s and sunshine.  About 30 minutes after tending to the bees I noticed A LOT of bees around the entrance and a few of them on the front starting to “beard”–okay, maybe it was too warm to install the bottom board on Saturday.  I moved it back about halfway and a few minutes later all was back to normal.  It’s okay to deal with one or a few hives in this manner but you sure couldn’t do this with more than a few!  I’ve got a lot to learn about beekeeping 🙂

Wintertime around here also means doing indoor things and that includes soap making.  I LOVE patchouli scent and bought a couple of patchouli plants this past summer.  They are in pots in the house and doing well.  I’ve been collecting leaves from them to make an oil infusion and finally gathered enough to actually get it done.  I used sunflower oil as the base oil (it’s cheap and effective for this purpose).  I stuffed a pint jar full of dried patchouli leaves then filled it with sunflower oil.  Heat a pan of water to boiling, remove from the heat and set the jar of oil and leaves into the pot of water and let it cool.  Put a lid on the mixture and shake it up every time you walk by it for a few months.

patchoulioil


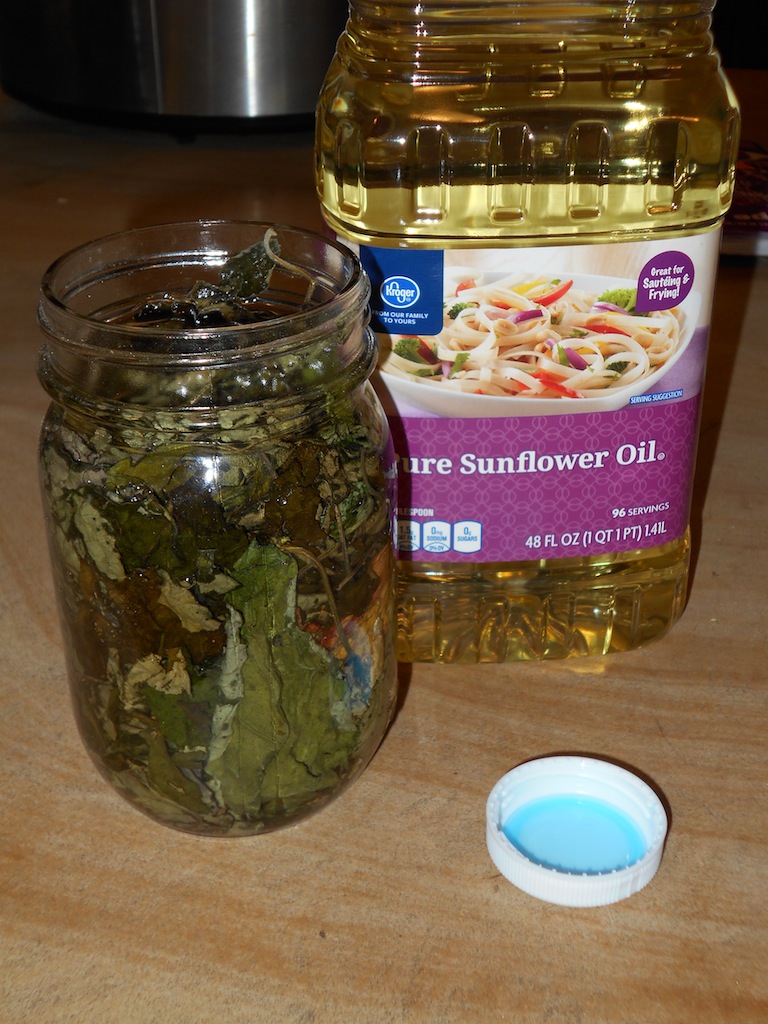
This is my first time doing this, so I’ll report back as the experiment progresses.

Lastly, the chimney for the woodstove is in progress–YAY!  Hopefully it will be ready to use by Christmas–I’m excited!

chimneyinprogressweb


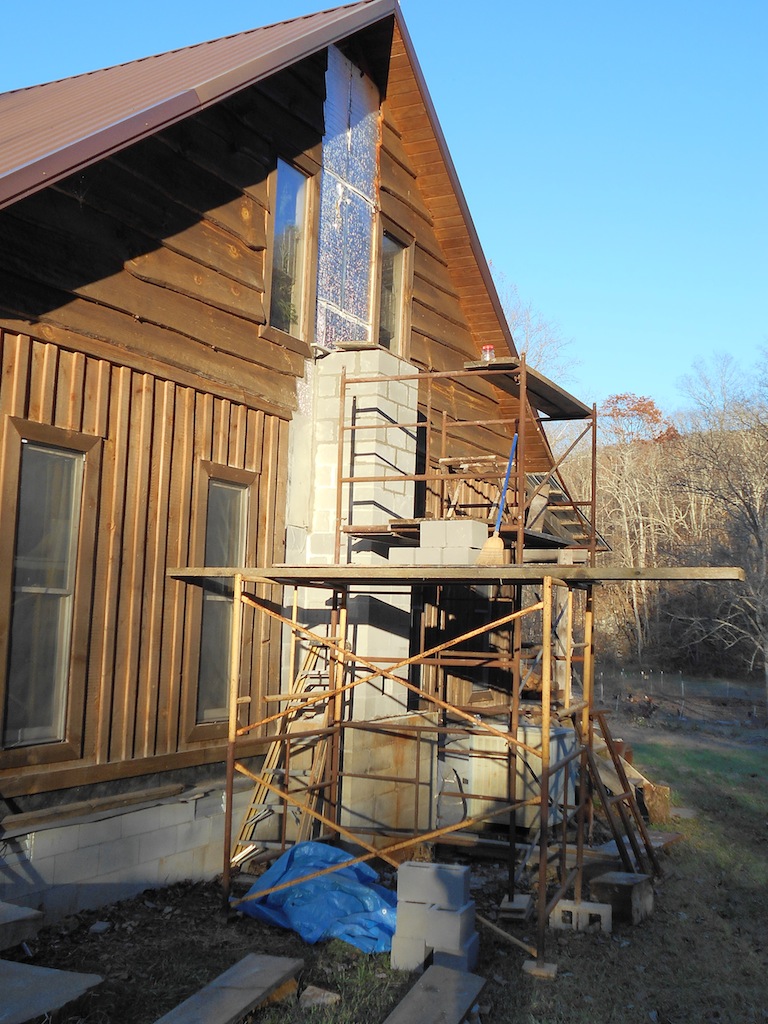
I plan on stuccoing the block since it’s on the back of the house and not visible unless you walk all the way around to the back of the house.

Another winter project around here is winterizing the gardens.  The front bluff garden was in pretty good shape but there were 3 beds of overgrown lettuce, pepper plants, and a few ugly cabbages in addition to a few weeds.

I moved the electric poultry fence around this garden since it’s adjacent to the chicken pen anyway.  The girls went nuts!

chickenpeninfrontbluff


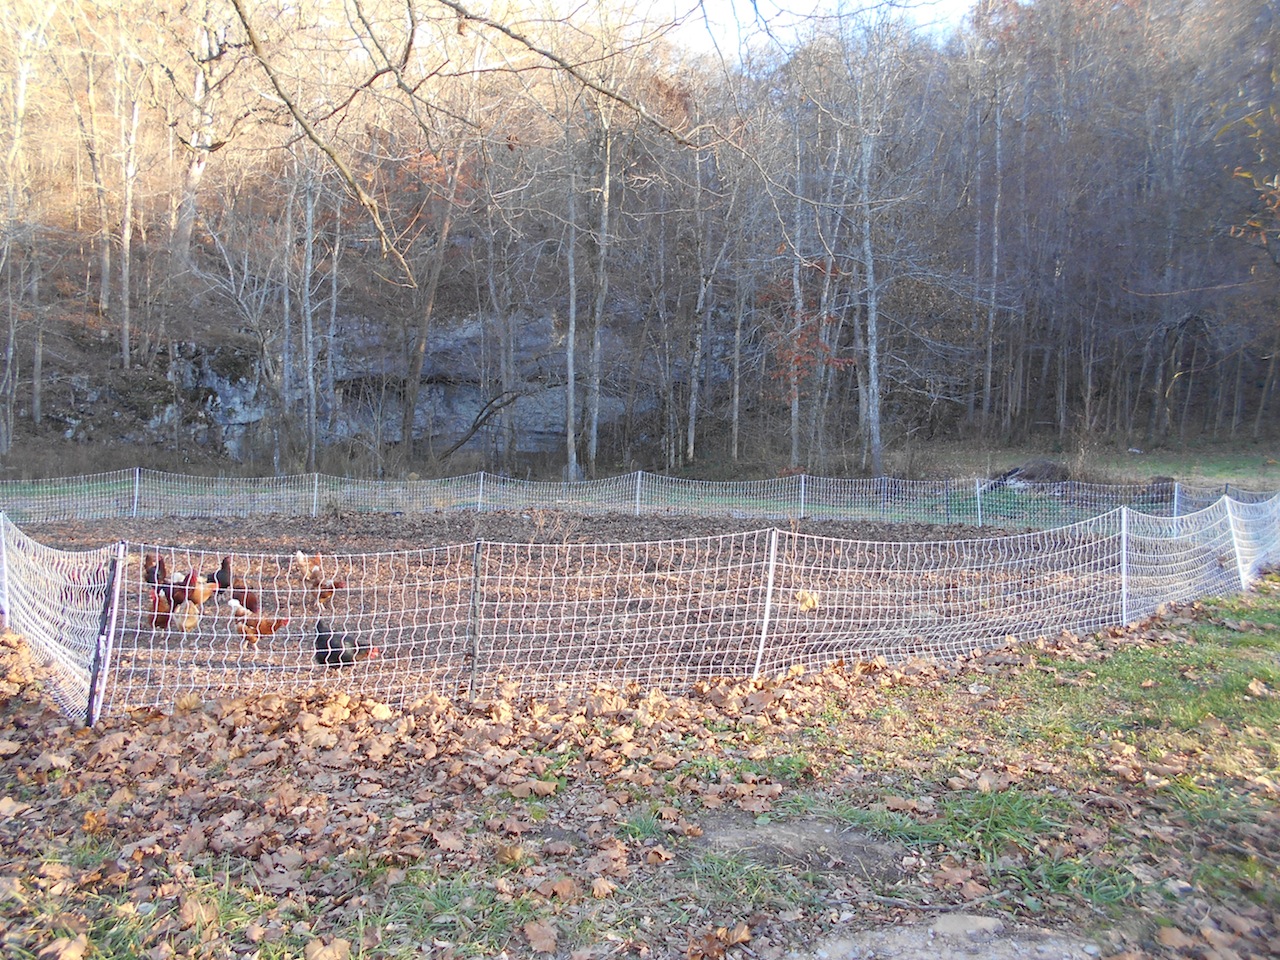
Now that they’ve gotten that garden cleared out they’ll be moved to the pond garden next–I appreciate all the help I can get 🙂


Building the Timber Frame House – Floors

When I painted the subfloor on my house red, I had a method for my madness.  You see, having been through the construction of two previous houses, I knew how long I would be sweeping water and snow off the floor so I added protection, but also, I knew how long I would be living on the floor until the finished floors were down.

As I stated earlier, my boyfriend is a stone mason.  Not just a run-of-the-mill stone layer, but he can do anything with stone.  One of my previous homes had a rock floor in the kitchen so I knew I wanted rock in the bathroom and the kitchen.  I had never laid a rock floor before, so I wanted to try my wings at it.  The bathroom is a small room, so it would be a good place to practice.  Shane just so happened to have enough stone “laying around” to do both the bathroom and kitchen 🙂

First I screwed Durarock cement backer board to the floor, then I selected enough rocks of the same thickness to cover the floor, plus some.  A real rock mason would use a hammer and chisel to cut the rocks but I just treated it like a jigsaw puzzle and fit the rocks together the way they were without breaking them.


To make up for some of the ummmm….larger grout joints I added broken arrowheads that I’d found on the property.  It gives you something to look at while you’re doing your business in the bathroom (ha).

After the bathroom floor was finished, I started on the kitchen floor.   Now that I was an expert (jk) I was ready to tackle this pretty large area.  I spent several weeks stepping over rocks and going different ways in the kitchen to avoid stepping on wet adhesive, wet grout, and then really nasty smelling sealer, three coats.  I didn’t like any of the colors of grout that were in the store so I mixed wood stain with the clear sealer to tone down the grout even more.  I liked the finished look.

kitchenfloorweba

PENTAX Image


PENTAX Image


The first wooden floor to come my way was the bedroom, closet, and pantry floors.  A friend had leftover white oak flooring that he wanted out of his storage building.  Heck yes I’ll take it off his hands!  I’ll store it on my subfloor 🙂

Shane helped get started and once the first few rows were down I took over.  It took every ounce of strength to hit that floor nailer with the rubber hammer, but it went down without a hitch and the very last row didn’t have to be trimmed to an odd wedgie shape–that was good!

bedroomfloorunderway12.2.10web


PENTAX Image


The next wooden floor to come about was the foyer and dining room.  That same friend who had the leftover oak flooring had some rosewood that he had been collecting and saving for years.  He used to work for an electrical company and he said that they ordered copper coils from Brazil, and they used rosewood planks for shipping (it’s a renewable resource there).  He thought it was pretty so he collected a bunch of it and had it planed and tongue-and-grooved for flooring.  For whatever reason, he decided he didn’t want to use it so he asked me if I wanted it.  I said “heck yes, I’ll take it”.  I started in the foyer not knowing how much there was–I knew there was enough for the foyer though.


After I got the foyer down there were a few boards left over.  That same friend called and said he had found some more of the rosewood flooring that I could have.  Wow, it was enough for the dining room!


PENTAX Image

The rosewood is really dark and shows dust and particles really bad, but the price was right and it’s really pretty.  Kind of reminds me of the wooden floors in my elementary school, except they were oily and mine aren’t.  The rosewood is the flooring on the left in the photo (dining room).

The final floor in the house was the livingroom floor.  Shane had a stack of maple lumber in his barn that he asked if I would like to have for my livingroom.  What did I say?  Heck yes!  I’m a lucky girl 🙂  He took it to a friend’s house and had it planed, kiln dried, and tongue and grooved.  While I was recovering from surgery (for cancer, it’s all gone 🙂 he installed the floor.  I laid on the couch and supervised.  It’s gorgeous!  The tree was the victim of a tornado that happened several years ago in a nearby community.  He got the log and had it sawed into boards and had been saving them in his barn–for me, I guess……

It’s really colorful, as far as wood goes, and is GORGEOUS!  It is easy to keep clean and I really, really like it a lot.

PENTAX Image


PENTAX Image

Building the Timber Frame House – Roofing and porches

My how times have changed.  Back in the early 80’s my ex and I wanted to put a metal roof on the log house we built–NOT!  No insurance company would touch it…..huh?  Nowadays it’s a common thing for folks to use metal, and I used metal on the timber frame house.  Don’t know why, but there aren’t any pics of the roof construction.

On top of the rafters I nailed 2×6 tongue and groove pine boards.  On top of that was a really good roofing underlayment, not roofing felt but a really strong nylon/plastic/”tyvec” sort of material.  Shane brought that over because we knew that it would be a while before the final roof was put on the house.

When the time did come to put on the roof, I had help (thank goodness) with most of it.  On top of the roll material was styrofoam insulation then another roll product that is aluminum foil/1/4″ foam rubber/aluminum foil.  It has an R-value of 14.5 and reflects heat out of the house in the summer and keeps heat in the house during the winter.  After heating the house for several seasons, I can say that it works really well.  On top of the aluminum foil, batten strips were screwed through the insulation into the decking, then the metal was attached to the battens.   Shane and a friend helped put the roof on one side of the house and got the first piece put on the other side of the house.  Several days went by and I waited…..severe thunderstorms were in the forecast for the afternoon so I did the unthinkable–something I probably wouldn’t do now–I climbed up on the house and put the metal on the remaining side by myself.  The electricians were working in the house and they were nice enough to slide the pieces of roofing onto the porch and stand them up where I could reach them.  It was stressful and hard, but it got done 🙂

The porches are 8′ deep and wrap around 3 sides of the house.  The joists are oak (given to me–hard to nail into, but free is good!) and the flooring is pine.  The framing nailer is a wonderful tool!

A friend across the way gave me enough cedar posts to use for the three porches around the house.  The south side of the house was left open to facilitate passive solar through the windows during the winter–that works well too!

PENTAX Image


In this photo you can see the roof is finished and the cedar posts are up–leftovers piled up for storage until needed for something else.  I went back to the friend (with a case of beer) and got smaller cedars for the top rails around the porch.  Fascia boards are on both sides of the house but the front fascia board is still laying on the porch waiting for installation.

Every construction site has a pair of blocks and board somewhere to step up into the house.  Shane kept saying that someone was going to get killed or break a leg on my temporary step, so he showed up at the house one day with a trailer load of really BIG rocks–Crab Orchard Stone, of course.  It’s a type of sandstone that is technically called “Tennessee Quartzite” but because it’s only found in areas in and around Crab Orchard, that’s what it’s called.  Anyway, he built the awesome set of steps going up to the porch–

I don’t think they are going anywhere……

A couple of years later he built a set going off the back of the porch–that was a birthday present.  I love rocks!

next up—floors and wall finishes

Building the Timber Frame House — Construction Details

It took about 9 months to get all the posts and beams notched and set into place.  Every single one was different, and a few I’d like to forget.  Several times during the construction I wish I had gotten the timbers planed to a consistent size, but like I said in an earlier post, the sawmill owners had lost all their planing equipment in a terrible fire so I chose to get the rough sawn timbers.

My “building inspector” had loaned me an awesome 1/2″ drill that was about a foot and a half long and if you let it get away from you it could break an arm, a jaw, a tooth, whatever.  12″ and 18″ screws were used to screw the timbers together and sometimes it took both Kim and I pushing on the drill to get them in place….I’m glad no one was watching….lol.   If the house is ever taken apart there will be interesting little notes scribbled in permanent marker on some of them 🙂

PENTAX Image

The original design for the house incorporated shorter timbers for the roof system that I thought I could handle by myself.  Mr. Building Inspector thought that it would be better if I used longer timbers that were taller and narrower than what I had designed (and bought) originally.  There were several pine trees down on his farm so he and I logged them out and a fellow with a portable sawmill came over and sawed out the roof beams:

PENTAX Image

The proper notches were calculated and cut into the rafters, then I took a router and rounded the edges, sanded them to get the “fuzz” off, and applied a finish to them.  All this took place in a corner of the house where I draped tarps and put a construction heater to keep me warm during the snow and frigid temps!  Fabricating the roof beams took place during the winter….brrrr!  I still had the timbers for the roof but they were utilized in the porch roof instead.

PENTAX Image


Mostly how I did the construction was to move the posts to the sawhorses in the work area, sand them down, notch them, then use the tractor with jig to set them on the scaffolding set up on the floor, then set the beams from the scaffolding.  A few of them were a little tricky, but I just took my time and prayed a lot 🙂  I still pray a lot–I need all the help I can get.

PENTAX Image

PENTAX Image


PENTAX ImagePENTAX Image


Once the posts and beams were up then the roof system was erected.  This was what you would call an old time “barn raising”.  There were about a half dozen folks from Crab Orchard that helped with getting the beams up and screwed into place.  I was in awe at the teamwork that went on.  It took quite a bit of beer to get the rafters up, but it happened!

There doesn’t seem to be any photos of the roof beams in progress, but it was pretty cut-and-dried.  The timbers were about 14″ tall, 4″ wide, and 20-3″ long.  They were place on 4′ centers and a collar tie was placed on each one with metal plates and lag screws.

PENTAX Image

You can see in the picture that the porches have been added.  I used 2×10 oak boards for the joists and poplar boards for the decking.  A friend gave me the cedar posts for the porch posts.  I did build the footers you see in this picture but I’m not really good at block work so my building inspector (seated in this photo) built the ones on the front and back of the house.  They were much taller than these short ones I tackled.

next roofing and more……


Building the Timber Frame House part 4–posts and beams

I had priced timber frame kits and they were way out of my budget.  A lot of rustic house plans have “fake” beams and timbers in them, although some are really timbers, they are not structural.  I didn’t like that concept.  If I’m gonna put a big hunk of wood in the house, it’s going to earn its keep.

After drawing up the plans and tweeking them for months, I finally threw away my eraser and took the plans to the sawmill.  They cut the posts and beams as well as the board and batten siding from hemlock, and the natural edge siding for the gable ends out of pine.  The sawmill I chose had recently had a very terrible fire and lost all their buildings.  In a recent conversation with the owner of the sawmill (while I was waiting on the boards for the beehives to be brought up) he told me that he had added on to each building over the years so there was no stopping point for the fire.  He also said that spiderwebs and cobwebs burned like gasoline.

Anyway, the logs were delivered and i stacked them and covered them until I was ready to use them.

PENTAX Image


Keeping lumber covered around here is a real chore.  See that little gap just beyond the stack of lumber?  The wind just blasts through there.  The house was located away from this funnel, up against one of the mountains surrounding the valley where the farm lays.

To begin the construction I started in the farthest corner from the work area.  It was also the tallest point from the ground–it’s amazing how a piece of ground can look relatively level but then when you put something as large as 32 x 40 on it one end is way up off the ground–the tallest edge of the house is about 4-1/2 feet tall!  I always imagined a porch like on Bonanza where you could step off onto the ground anywhere–oh well, this ain’t the Ponderosa.

The first post was really a difficult chore.  You see, I’d always been the helper so that meant there were four hands available; now there were only two.  So, I used the tractor forks, nailed 2×4 supports on, and cussed a lot–it’s okay if you’re not offending anyone and the dogs really didn’t mind 🙂


PENTAX Image


After the first one the second one was just as hard….then they got easier…..or maybe not…..

PENTAX Image

At some point during the early construction, a guy who did masonry work for the company I worked for started coming around.  He said he was my “building inspector”.  I think he was just curious about a woman building a house.  He loaned me lots of tools, gave me lots of advice, and showed me tricks on how to do things.  One thing he loaned me that was invaluable for a very long time during the construction process was the wheels to go on the scaffolding–so much easier than dragging them around on my pretty red subfloor.  He also would help plumb posts in the evenings so more sturdy braces could be put on what I constructed during the days.

Even though it was terribly hard work and I was sore and tired each evening, it was gratifying.  My best friend came over every weekend and helped SO MUCH!  She’s a city girl but I think she really enjoyed the challenge, PLUS she could brag to her sisters about what she was doing on her weekends!

PENTAX Image


This was an unorthodox position for her to be sanding but she was just knocking off one side we missed.  I will say that there are more pictures of her helping, but she wanted to get a suntan so most of the pics are not webworthy of her in her bathing suit.  We were a mutt and jeff team with me trying to avoid sunshine in overalls, hat, and long sleeves and her trying to get a suntan!  Back to construction details……

PENTAX Image


My “building inspector” fabricated a log mover that fit on the forks of my tractor so I could set beams up on the scaffolding so they could be more easily set on top of the posts.  Now that it’s all over I can say that I never dropped one and no one got hurt during the entire construction process.  I remember during the construction of the first log house with my ex–we were working on the very top log, I think the last one, and it got away from us and hit the ground about 1 foot from one of our dogs–that was a heart failure!  I kept the dogs away from where I was working just to avoid a similar situation.  I had four dogs at one point during this project…..


PENTAX Image


That would be Cooper, Ralph, Buck, and Shaq–all gone to doggie heaven now, but my constant companions while they were here on earth.  I just love dogs……

next up…..some construction details.

Building the Timber Frame Home Part 3–Floor System

Before the floor system went down, the ground inside the footer was leveled out with shovels, mattocks and hoes then rubber roofing salvaged from a building re-roof was put on the ground as a vapor barrier.

I was soooooo excited to finally get to the wood and nails and “house stuff”.  The barn was a really great place to store all the lumber I bought for the floor system, although the barn swallows were really making a mess of the plywood and lumber (yuk!)  The foundation was pretty square so I had  something good to work on (I needed all the help I could get).

PENTAX Image

The stringers and joists were nailed into place with a newly purchased Paslode air-powered framing hammer.   To keep all my tools organized I found a trailer in the weeds on the farm and the owner said I could have it, so a piece of plywood was attached to the frame for a floor , then I screwed my air compressor down, attached a tool box, and voila!  Work trailer.  Parked right next to the temporary pole, it made a handy work station.

PENTAX Image


PENTAX Image

My shoes were so muddy that I didn’t want to get that awful sticky clay all over the pretty clean plywood, so I was in my sock feet screwing down the plywood.


PENTAX Image


The first piece was, well, a real bear.  Kim was there helping and snapped a pic of the sigh of relief once the first one was down and square.

PENTAX Image PENTAX Image

Once the first one was down, the rest were pretty easy, relatively speaking.  Seems like everything was a lot harder to actually do than to watch other people do (that really knew what they were doing 🙂 )

Two coats of red exterior paint made the subfloor a little more weatherproof because I knew from past experience that the floor was going to be exposed to the elements for a while and also that I would be looking at the floor for a while after I moved in.  Red was my choice…….

PENTAX Image

One thing I did do that isn’t shown in any of the pics is to put a termite shield on the foundation underneath the pressure-treated sill plate.

Next up–the timbers!

Building the Timber Frame House Part 2–Designing House and Footers

When people see the house they invariably ask the question “Where in the world did you learn how to do this?”  Well, a lot of it is trial and error, but my very first experiences with building were with a Lincoln Log set…yes….that’s what I said.  I LOVED playing with Lincoln Logs BUT i always ran out of the green slats to make the roof, I guess because I always built them too big!

My career was in Facility Management, so for about 30 years I hung out with guys and tools every day, supervised mostly maintenance, but several construction projects, and as I posted earlier, my ex-husband and I built two log houses from scratch.  One thing I have discovered is that it is much easier to ask someone to go do something than it is to do it yourself.  Those guys all knew what they were doing in their trades and they made it look easy!

Living in a log house was a lot of fun because they are so easy to decorate and if you make sure all the cracks are sealed, they are relatively easy to heat.  They are dark though, and for that reason I chose to build a timber frame home.  I love the exposed beams and rustic look, but wanted lighter walls this time.

I started looking through magazines, online, going to visit timber frame manufacturers, and even put a deposit down on a timber frame from a North Carolina company.  After a month of worrying about being able to afford it, I found the book “Timber Framing for the Rest of Us” by Rob Roy and that opened up my eyes.  I didn’t have to do all those fancy mortise and tenon joints on timbers, just simple notches and metal plates.  A call to the timber frame company cancelled my order (thank goodness they were running way behind) and I started drawing up plans.

I wanted a simple house, but larger than the one that burned–it was only 24 x 24 and there wasn’t room in the house anywhere that I could set up my quilt frame or get away from the constant drone of the tv, except outside.  I found a plan which utilized a simple grid of 8×8, 8×10 and 8×12.  The house is 32×40, with the 32 foot dimension divided up into 8 foot bays and the 40 foot dimension divided up into 2-10 foot bays (living/dining area), one 8′ bay (bathroom/closet/part of kitchen) and a 12′ bay (bedroom/foyer/pantry/rest of kitchen).  A loft upstairs is my quilting/sewing/craft studio and spans the 8′ and 12′ bays.

During the two years since running away from home I had collected 4 french doors at a yard sale, about 2,000 square feet of 3/4″ solid oak paneling from a restaurant that was being demolished, and the door from the bar which has the word “Lounge” etched in the glass (that was definitely going to be my bathroom door).  At last the dream was coming together.

The same guy that put the driveway in dug the footers.  We discovered that the soil here is truly crappy–really crappy.  It is actually fill dirt from when TVA dug the canal, so it’s full of clay and rocks.  The septic system was flagged for just off the edge of the fill dirt in the native soil, which is a wonderful sandy, loamy soil.


PENTAX Image


It doesn’t look like much at this point, but I was so excited!

Asking around town, I found a block mason to lay the blocks–I’m not very good at masonry work, although I did lay the blocks on the front side porch and they are still up 🙂

PENTAX Image


The porches didn’t go on until later in construction.  Next item on the agenda was to grout in the anchor bolts…..then put down the pressure treated plate.  This step went smoothly—I wish I had put the foundation vents in at that time, but I didn’t–brain fart!

PENTAX Image


next up….floor system.

Building the timber frame home–Part one: planning and driveway construction

House construction began in 2006 and the entire process was documented with pictures but I’m just now getting time to post the entire process on the blog.  I’ll try to keep it chronologically consistent to avoid much confusion.

Back in 2004 I was the victim of what many people fear–a house fire.  In addition to the house, the barn, garage, and greenhouse all burned.  The house was a cute little log cabin that my ex-husband and I built together–from scratch.   So much for historical facts–shortly after that I was single once again, and after having been the helper on two scratch-built log houses, I wanted to build my own.

The search for property was on.  I wanted what millions of other Americans were looking for, 3-5 acres in the country with a stream or pond.  After looking for a year or so I was in a local hardware store and ran into an old friend/former co-worker who informed me that he and his wife had just moved into town from their farm.  He told me they were going to sell the farm (65 acres) and my eyes lit up, heart skipped a beat….maybe…..

That afternoon I headed out to Crab Orchard.  I had heard of a back way there so rather than go the most direct shot to the property, I had to take the scenic route.  I got lost on my first trip to the property and ended up about 10 miles down I-40.  I did find the property and it was a beautiful valley in between a mountain a a big hill.

At the time I was renting a small house in town and the owners of the farm asked if I would move out to the farm and rent from them.  I was only paying $200 a month for the house in town, BUT I was still paying on a mortgage for the torched cabin.  They let me rent the place on the farm for $200–wow, good things do happen to people!  I had asked if he would consider selling part of it.  He said “yes”.

My son and I moved to the farm and I started trying to narrow down which part of the farm I wanted, as I was given permission to “stake my claim”.  I knew I wanted to build a house so I didn’t want the portion with the doublewide on it.  The neat old barn was on the part near the trailer, but I could always build my own barn if I needed it.

The other end of the property had a cave and a year round stream on it, woods and several open fields–that’s what I wanted.  Walking with the surveyor on that cold wintry day was so exciting, helping him drive stakes in the ground and then getting the results on how much acreage I had staked claim to–26.3 acres…..mmmmmm okay.

In May 2006 ground was broken and the driveway was excavated.

PENTAX Image PENTAX Image PENTAX Image


The “canal” I’m crossing is a canal that was dug back in the late 70’s by TVA to drain Crab Orchard during floods.  Crab Orchard lies pretty much in a valley and the farm is at the northernmost tip of the valley.

Next up:  footers and subfloor